Spring Hot Tub Maintenance Checklist: Prepare Your Spa for Peak Season
-
Share
Spring is just around the corner, and there’s no better time than late winter and early spring to prepare your hot tub for peak season. While most hot tub owners wait until April or May to think about maintenance, savvy homeowners know that getting ahead of the rush means better service availability, lower stress, and a spa that’s ready for guests when the weather turns warm.
The difference between those who prepare early and those who wait is dramatic, early planners avoid emergency repairs, secure convenient service appointments, and enter the summer entertaining season with complete confidence in their spa’s performance. This comprehensive spa maintenance checklist will guide you through every step needed to prepare your hot tub for spring, ensuring reliable operation and preventing costly surprises.
Why February and Early March are Prime Time for Spring Spa Preparation
Timing matters when it comes to hot tub spring preparation. Service technicians have significantly more availability before the April and May rush when everyone suddenly realizes their spa needs attention. During these peak months, you might wait weeks for an appointment, and critical replacement parts may be backordered as suppliers struggle to keep up with demand.
The weather window in late winter and early spring also works in your favor. Milder days make outdoor maintenance tasks more comfortable than they’ll be in the peak heat of summer. You’ll also get ahead of pollen season, which can quickly clog filters and cloud water if your spa isn’t properly prepared.
Most importantly, completing your spring hot tub maintenance now means you can identify and address any issues discovered during inspection well before you’re planning to entertain guests. There’s nothing worse than discovering a problem the day before a party.
Step 1: Inspect Your Hot Tub Cover
Your hot tub cover works harder than any other component, protecting your spa from debris, weather, and heat loss every single day. Start your spring preparation by giving it a thorough inspection. Lift the cover and assess its weight—a properly functioning cover should feel relatively light, while a waterlogged cover becomes noticeably heavy and difficult to manage. When foam cores absorb water, they lose their insulating properties and can add fifty pounds or more to the cover’s weight.
Examine the vinyl surface carefully for cracks, tears, sun damage, or areas where the material is deteriorating. Pay special attention to the seams and corners where damage typically begins. Check how the cover sits on your spa, it should seal flush against the edge all the way around. Gaps allow heat to escape and can increase your operating costs substantially. Finally, inspect all hardware including:
- Cover locks and latches
- Handles on each side
- Tie-down straps
- The hinge where the two sides connect
Early spring is the ideal time for cover replacement because you’re making the change before summer heat accelerates deterioration of an already-compromised cover. If your cover is over five years old or showing significant wear, visit The Sundance Spa & Sauna Store for a perfectly fitted replacement. Quality covers are an investment that pays dividends through reduced energy costs and better protection for your spa.
Step 2: Deep Clean Your Spa Shell
A thorough shell cleaning gives you a fresh start for the season and provides an opportunity to inspect your spa’s interior condition. If you haven’t drained your hot tub in the last three to four months, now is the perfect time. Once empty, use a non-abrasive spa-specific cleaner to scrub the entire shell surface. Pay particular attention to:
- The waterline where oils and minerals accumulate
- Around each jet where biofilm can develop
- Corners or recesses that are hard to reach during normal use
This deep cleaning removes buildup that routine maintenance can’t address. Biofilm, a slimy layer of bacteria and organic matter, can harbor contaminants and interfere with sanitizer effectiveness. Removing it creates a truly clean environment for your fresh water. While you’re scrubbing, inspect the shell carefully for any cracks, chips, or surface damage that might need professional repair. Early detection of structural issues prevents them from worsening over the season.
Step 3: Clean or Replace Filters
Filters are your spa’s first line of defense against contaminants, and they work incredibly hard throughout the year. Remove all filters from your spa and inspect each one carefully. Look for:
- Tears, crushing, or deterioration of the fabric material
- Persistent discoloration that won’t rinse away
- Unusual odors
- Areas where the pleats have become misshapen
For filters that pass visual inspection, perform a thorough deep clean. Soak them overnight in a proper filter cleaning solution that breaks down oils, lotions, and mineral deposits that regular rinsing can’t remove. After soaking, rinse each filter thoroughly with a standard garden hose, working from top to bottom to flush debris out of the pleats. Never use a pressure washer, as the intense spray can damage the filter fabric and reduce its effectiveness. Allow filters to dry completely before reinstalling them in your spa.
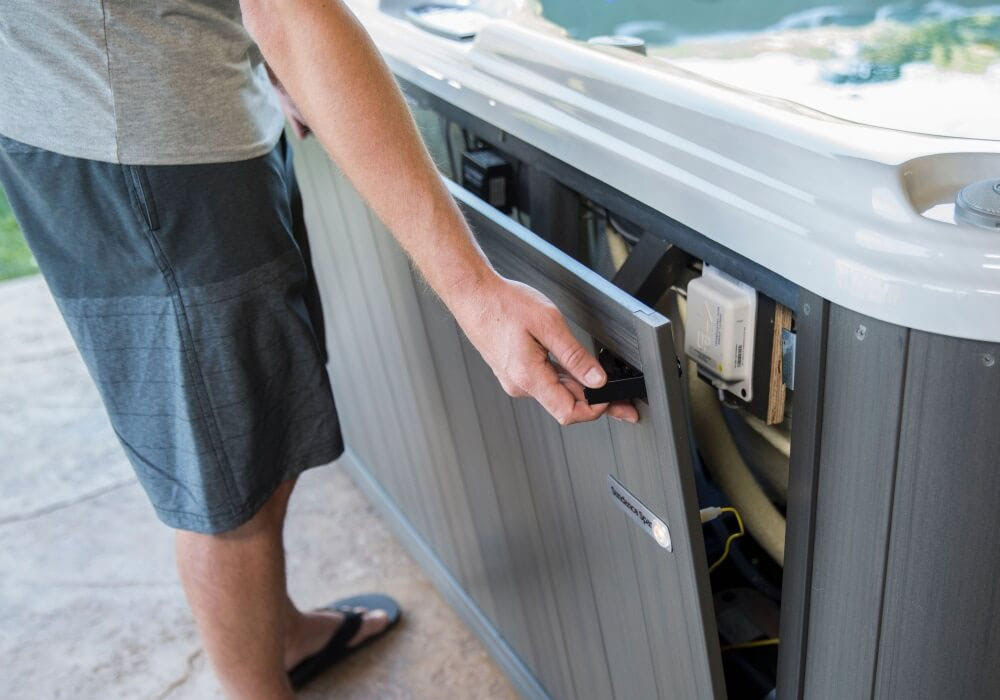
Step 4: Inspect and Clean Jets, Pumps & Equipment
Jets are the heart of your hydrotherapy experience, and spring preparation should include attention to each one. Remove the jet faces by turning them counterclockwise, then soak them in a cleaning solution to dissolve any mineral buildup or debris. Clear the jet openings of any accumulated material, then test each jet after reinstalling to ensure proper rotation and water flow. Restricted jets reduce your spa’s performance and can indicate larger circulation issues.
Move to your equipment area and conduct a thorough inspection of your pumps and related components. Start by simply listening—turn on each pump and listen for any unusual noises like grinding, squealing, or rattling that weren’t present before. These sounds often indicate bearing wear or other mechanical issues that will only worsen. Visually inspect for:
- Leaking or moisture around pump seals and union connections
- Corrosion on electrical connections
- Leaves, debris, or spider webs in the equipment compartment
Step 5: Test and Balance Water Chemistry
Proper water chemistry is fundamental to both spa performance and user safety. If you’ve drained your hot tub for shell cleaning, you’ll be starting fresh with new water that needs complete balancing. If you’re keeping your existing water, this is still an excellent time to perform comprehensive testing and make any necessary adjustments to establish a clean baseline for the season.
Test and adjust the following parameters:
- pH to the ideal range of 7.2 to 7.8
- Total alkalinity to 80-120 parts per million
- Calcium hardness to 150-250 ppm
- Sanitizer levels (chlorine or bromine) to appropriate ranges
Finally, perform a shock treatment to oxidize any organic contaminants and establish a pristine water environment.
Step 6: Check Heating and Control Systems
Your heating system is critical to spa enjoyment, so spring preparation should include a thorough check of its operation. Verify that your heater reaches and maintains your set temperature without repeatedly cycling on and off. If the heating element has developed scale buildup from mineral deposits, it will work less efficiently and take longer to heat your water. This not only frustrates you but also increases electricity costs. Test that the high-limit switch—a safety feature that prevents overheating—is functioning properly by monitoring whether the system shuts down appropriately if water temperature exceeds safe limits.
Move to your control panel and systematically test all functions:
- Press every button and verify the expected response
- Check that the display shows accurate temperature readings
- Verify all settings respond correctly
- Update programmable features for spring and summer usage patterns
- Ensure the system operates error-free
Step 7: Refresh Your Spa Surroundings
The area surrounding your hot tub contributes significantly to the overall experience, and spring preparation should extend beyond the spa itself. Power wash your deck, steps, and all surrounding surfaces to remove winter grime, mildew, and accumulated dirt. While cleaning, inspect for any loose boards, protruding nails, splinters, or other safety hazards that could cause injuries. If your deck needs fresh sealant or stain, spring is the ideal time to apply it before regular use resumes.
Turn your attention to landscaping around the spa area:
- Trim back overhanging branches that will drop leaves or debris
- Clear winter debris from around your equipment
- Plan seasonal plantings that enhance privacy
- Consider natural windbreaks
Step 8: Safety Equipment Check
Safety should never be an afterthought, and spring preparation provides an excellent opportunity to verify that all safety systems function correctly. Complete the following safety checks:
- Test your GFCI breaker by pressing the test button
- Inspect cover locks (especially important if children visit)
- Verify handrails are firmly attached and stable
- Check that lighting around your spa area works properly
- Ensure emergency shut-off is clearly marked and accessible
- Review safety guidelines with all family members
Your Spring-Ready Checklist Summary
Use this quick-reference checklist to track your progress through spring hot tub maintenance:
- Inspect and replace your cover if needed
- Deep clean your spa shell
- Clean or replace all filters
- Inspect and clean jets, pumps, and equipment
- Test and balance water chemistry completely
- Check heating and control systems for proper operation
- Refresh spa surroundings including deck, landscaping, and accessories
- Complete a safety equipment check
- Schedule professional service for comprehensive inspection
Working through this spa maintenance checklist systematically ensures nothing gets overlooked. Each task builds on the previous one, creating a comprehensive preparation process that leaves your spa in peak condition for the season ahead.
Get Ready for Your Best Season Yet
Completing your hot tub spring preparation in late winter and early spring gives you an enormous advantage over homeowners who wait until the last minute. You’ll beat the service rush, ensuring convenient appointments and readily available parts. You’ll identify and address any issues well before you’re planning to entertain guests. Most importantly, you’ll enter the season with complete confidence that your spa will operate reliably and beautifully whenever you want to use it.
Small investments in time and preventive maintenance now can save you from expensive emergency repairs later. Following this checklist helps you avoid the frustration of discovering problems at the worst possible moment and ensures your spa provides reliable enjoyment throughout the entire season. Whether you’re planning intimate evenings under the stars or lively gatherings with friends, your properly prepared spa will be ready.
The Sundance Spa & Sauna Store is here to support you through every step of spring preparation. Visit any of our Sundance Spa & Sauna Store locations to stock up on all maintenance supplies, replacement parts, filters, covers, and water care products you need. Our knowledgeable staff can answer questions, provide guidance on any challenges you encounter, and help you find exactly what your specific spa requires.